- Liittynyt
- 09.06.2017
- Viestejä
- 1 120
Follow along with the video below to see how to install our site as a web app on your home screen.
Huomio: This feature may not be available in some browsers.
Joo, en ole pelidevaaja, mutta vilkaisin:Uskoo ken tahtoo. Demoja ja trialeita on edelleen tänä päivänä ja ne ketä niitä ulos puskee selvästi luottaa oman tuotteeseen. Kuten @Sadness sanoi niin riski ampua omille jaloille on suuri kun nykyään suolletaan keskeneräistä roskaa pihalle.

Configuring a usage-limited trial in Partner Center
NOTE: You can access this feature only if you have the proper permissions and if your game uses restrictive licensing. For details, contact your Microsoft account manager.
You can configure usage-limited free trials in Partner Center without altering the game's code. However, you have to add code in the following scenarios:
- You want to restrict access to users who acquired the trial
- You want to save the game state between play sessions; the save carries over if the game is purchased with the same Microsoft account as the one that was used to acquire the trial
After you publish your game to Microsoft Store, you'll see the trial information on the game's product page.
- From the Submission overview page, go to the Pricing and availability page.
- Under Free trial, open the drop-down menu, and then select Usage-limited.
- In the second drop-down menu that appears, select the maximum time that users can use your app.
- Select Save.
Sinä siirsit maalitolppia siirtyessäsi puhumasta pelistä lähes valmiiseen/valmiiseen peliin, johon väittämäsi mukaan ei ole vaikeaa tehdä content- ja/tai aika rajausta
Katsos, näin helppoa se on kun vähän yrittää, olisit saanut tämän saman asian tuotua esiin jo ensimmäisessä viestissäsi sen sijaan että viestitolkulla vänkäät ja selität epämääräisyyksiä, lainaat pitkiä kappaleita ilman että saat olennaista tuotua esiin.
Minulle oli alusta lähtien täysin selvää että puhun nimenomaan valmiiden/lähes valmiiden pelien demot ja oletin että täällä kaikki tai ainakin suurin osa muistakin puhui juuri samasta asiasta.
Ja katso mistä keskustelu lähti, sinä väitit itse ilman mitään disclaimereita tai tarkennuksia että demot vaativat devitiimiltä paljon resursseja - tämä väitehän ei pidä kategorisesti paikkaansa vaan ainoastaan niissä tapauksissa joissa pelin kehitys on vielä suhteellisen alkuvaiheessa ja tällaisia demoja ei tosiaan ole tullutkaan pitkiin aikoihin, ainakaan montaa.
Joo, en ole pelidevaaja, mutta vilkaisin:

Implementing Trials for your game - Microsoft Game Development Kit
Describes trial options and how to configure usage-limited free trials in Partner Center.docs.microsoft.com
Eipä aikarajatun trialin ulos puskeminen rakettitieteeltä vaikuta, ja työmääräkustannukset taitavat olla kohinaa markkinointibudjetissa.
Suurempana syynä trialeiden olemassaolon vähyyteen pidän heikkoa luottoa omaan paskeeseen.
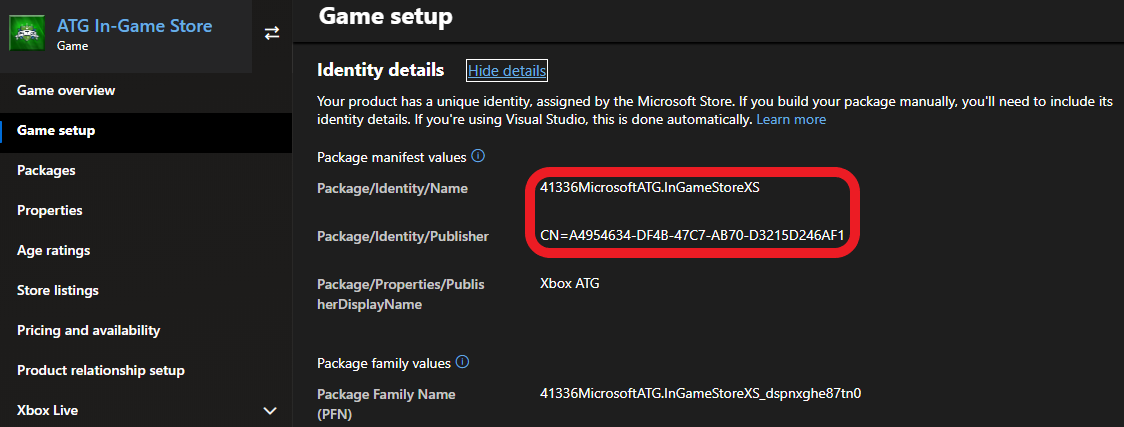
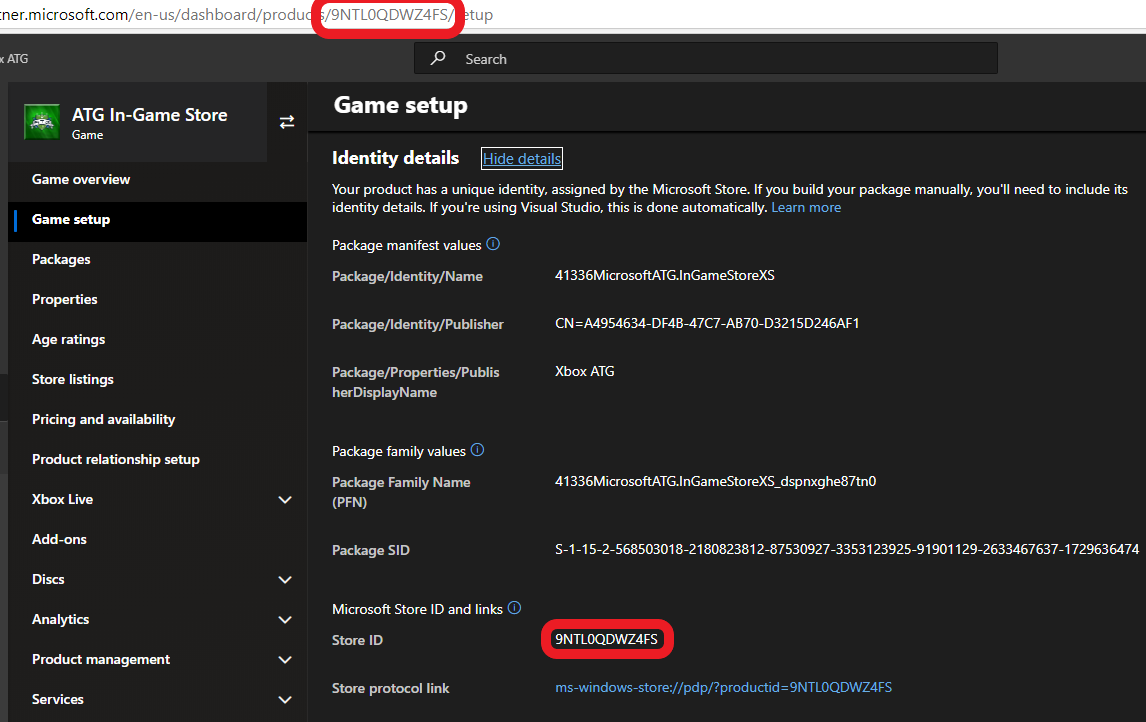
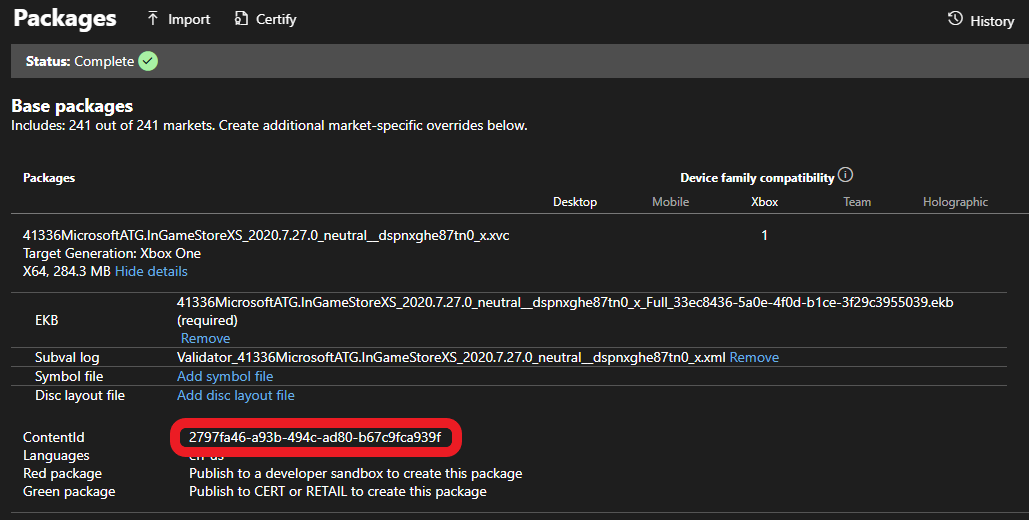
| App identity | Store ID | Content ID | EKBID | Test account | |
|---|---|---|---|---|---|
| Console Visual Studio (F5) | Can be anything | Present | Must be specified using ContentIdOverride in microsoftgame.config | Must be specified using EKBIDOverride in microsoftgame.config | Must be entitled |
| Console local package (XVC) | Can be anything, but must match assigned value when submitting to Partner Center | Present | Content ID must be specified using makepkg | Must be set using xbapp setekbid | Must be entitled |
| Console store package | Will match value assigned in Partner Center | Present | Will be the proper content ID | Will be the proper EKBID which depends on license type | Must be entitled |
| PC Visual Studio (F5) | Must match value assigned in Partner Center | Not required | Not required, but overriding value may be present in registry | Not required | Must be entitled |
| PC local package (MSIXVC) | Must match value assigned in Partner Center | Not required | Content ID must be specified using makepkg | Not required | Must be entitled |
| PC store package | Will match value assigned in Partner Center | Not required | Will be the proper content ID | Not visible | Must be entitled |
SummaryIMPORTANT: This must be done for each and every account that runs the build and expects in-game commerce features to work.
Luehan nyt artikkeli uudestaan, taisi jäädä jotain hyvin olennaista lukematta. Lainasin siitä olennaisimman pätkän omassa aiemmassa viestissäni.
Niin keskittyi tuohon kun huomasi puhuvansa läpiä päähänsä ja maalitolppa vaihtui lennosta lähes valmiiseen/valmiiseen peliin, jossa trial toteutetaan ajallisella tai contenttia rajaamalla. Missä välissä minä väitin että tuossa tapauksessa trialin tekeminen olisi työlästä, kun näin en ole tehnyt?
Kyllä, olen edelleen sillä kannalla että etenkin singleplayer-pelien osalta demon tekeminen ei ole niin yksinkertainen juttu kuin ketjussa on annettu ymmärtää. En tiedä sinusta, mutta omassa vaakakupissa ehdan devin mielipide asiasta painaa enemmän kuin foorumin nojatuolipelinkehittäjien näkemys.

Everything you need to know about making and releasing a demo
Just how instrumental demos can be to a game's success is often underestimated by new developers.www.gamesindustry.biz
Myös Techradarin artikkeli tukee näkemystäni:
" Predicting that developers may not be able to invest the time and money on making a demo alongside the actual game, Microsoft says it will be compensating the game makers. It hopes this will encourage developers to participate in the scheme, especially as, on top of the money they could earn, developers will have access to data on how their games perform. "
Mutta mitäpä minä tästä tietäisin, ilmeisesti MS on heittämässä tässäkin rahaa kankkulan kaivoon kun kerran tämä on teknisesti niin yksinkertaista?
Jaa sinä olet höpöttänyt koko ajan jostain erikseen pelin kehityksen aikana rakennettavat demosta... No eipä semmosia kukaan enää tee, eikö semmosten tekemisessä olekaan mitään järkeä.

Ei ole minun ongelmani että et edes ymmärrä itse mitä olet itse kirjoittanut, vaikka nämä eritellään ja lihavoidaan sinulle suorilla lainauksilla.
Keskustelu lähti siitä liikkeelle, kun esitit naurettavan väitteesi demojen puutteen olevan vittuilua.
Se että lainaat useita viestejä etkä *pyynnöistä huolimatta* suostu tarkentamaan mitä tarkoitat kertoo minusta varsin epäkypsästä keskustelukulttuurista. Toisten aivoituksia on välillä vaikea arvata joten jos pyydetään tarkennusta niin se on kohteliasta antaa.
Ehkä jatkossa sitten kypsemmällä pohjalla vai mitä.
On todella hämmentävää miten joko todella törkeästi vääristelet toisten sanomisia tai sitten et yksinkertaisesti ymmärrä lukemaasi.
Minä sanoin näin:
Lähtökohtaisesti demot aina ilmaisia ilman mitään erillistä maksavaa palvelua, kaikki muu on vittuilua.
Minä en siis millään tavalla ole sanonut demojen puutteen olevan vittuilua, on täysin käsittämätöntä miten vääristelet noin törkeästi toisten sanomisia.
Trialin tekeminen tuskin vaatii lisä punnisteluita kun se tehdään onlinessa, sinulla katkee vain pelin käyttöoikeus kun poistut onlinesta tai että pelillä tulee tarpeeksi tunteja täyteen.
Ja jos olet tyytyväinen peliin niin voit jatkaa pelaamista siitä mihin jäit kun laitat koneeseen levyn tai ostat pelin online palvelusta, demoissa yleensä oli niin että se oli oma erillilinen pelinsä ettei onnistunut jatkaa peliä tallenuksesta enään jos sitä edes oli saatavilla.
Aimo annoksen?Tuossahan siitä oli faktaa kuin se käy MS Storessa, itse toimenpide on varsin yksinkertainen, sen sijaan testaaminen vaatii jo aimo annoksen lisätoimenpiteitä.
Aimo annoksen?Linkkaamasi ohjeessa ei ole mitää erikoista, perus conffailua, joka tällaisen "ei-peliohjelmoijankin" rutiiniin kuuluu. Ei toi mitää extratyötä ole eikä pelkästään, jotta saa trialin julkaistua.
Kerrotkos sitten vielä kuinka tämä muuttaa keskustelun sisällön?
Ihan huvikseenko tuon kokoinen firma maksaa kompensaatiota kehittäjille jotka näin tekevät, kun tässä ei mielestäsi ole mitään järkeä?
Syitä tähän onkin mielenkiintoista spekuloida. Eikö Game Passin tarjoamat korvausmallit ole riittäviä 3rd party julkaisijoille, kun nyt halutaan tuoda palveluun kokonaisten pelien lisäksi demoja MS:n kannustamana? Eikös GP:n idea ollut alunperin että saat kuukausimaksulla pelattavaksesi läjän kokonaisia pelejä, jotka saat omaksesi alehinnalla pelin poistuessa palvelusta?
Liian kompleksisia simulaatioita pelit nykyään. Toki syy on myös pelaajissa jotka vaativat koko ajan parempaa ja mikään ei riitä. Jos pelissä ei voi vapaasti tehdä mitä haluaa niin se on metacritic 0 arvostelu ja somessa huudot päälle että säikäytetään muut. Demo voikin olla suuri riski tuotannolle, varsinkin kun deadline painaa päälle ja pelissä on räikeitä bugeja mutta rahaa pitäisi saada jo.Ja sit se, että liian monet pelit julkaistaan keskeneräisinä nykyään (tai ainakin loppuviimeistely on tekemättä). Kuka olisi ostanut esim. Cyberpunkin lauchista jos olisi ollut demo käytettävissä? Grafiikkaongelmia varisinkin on uusissa peleissä heti alussa. Voisi jäädä ostamatta täyteen hintaan jos olisi nähnyt sen jo demossa. Se on huono pelijulkaisijoille jos kaikki vaan odottaa että peli on alennuslaarisa ja ehkä siinä vaiheessa jo patchatty kuntoon. Demo saattaisi kannustaa siihen.
Se oli loistava esimerkki sinun tahallisesta vääristelystä mitä olet harrastanut jatkuvasti tässä ketjussa, kaikki on tämän huomannut jo pidemmän aikaa. Haet tahallaan vänkäämistä tällä tavalla, rakennat olkiukkoja vääristelemällä tahallaan muiden sanomisia.
Varsin surullista lukea noin epäkypsää keskustelua.
 Ja kehtaatkin luennoida muille epäkypsästä keskustelusta, jo on kaverilla otsaa!
En tiedä mitään kompensaatiosta, mutta ei mitään early demoja nykyään juuri tehdä, koska se syö juuri kehitystiimin aikaa ja resursseja.
Ennen ne ennen itse peliä julkaistut demot toimi pelin markkinointina ja se olikin niiden päätarkoitus. Nykyään kun pelejä ei enää markkinoida demoilla, niin tuommoisella erillisellä aikaisella demoilla ei ole oikein mitään virkaa. Ja jos demo julkaistaan samaan aikaan itse pelin kanssa, niin silloin ei mitään erillistä demobuildiä tarvita.
Liian kompleksisia simulaatioita pelit nykyään. Toki syy on myös pelaajissa jotka vaativat koko ajan parempaa ja mikään ei riitä. Jos pelissä ei voi vapaasti tehdä mitä haluaa niin se on metacritic 0 arvostelu ja somessa huudot päälle että säikäytetään muut. Demo voikin olla suuri riski tuotannolle, varsinkin kun deadline painaa päälle ja pelissä on räikeitä bugeja mutta rahaa pitäisi saada jo.
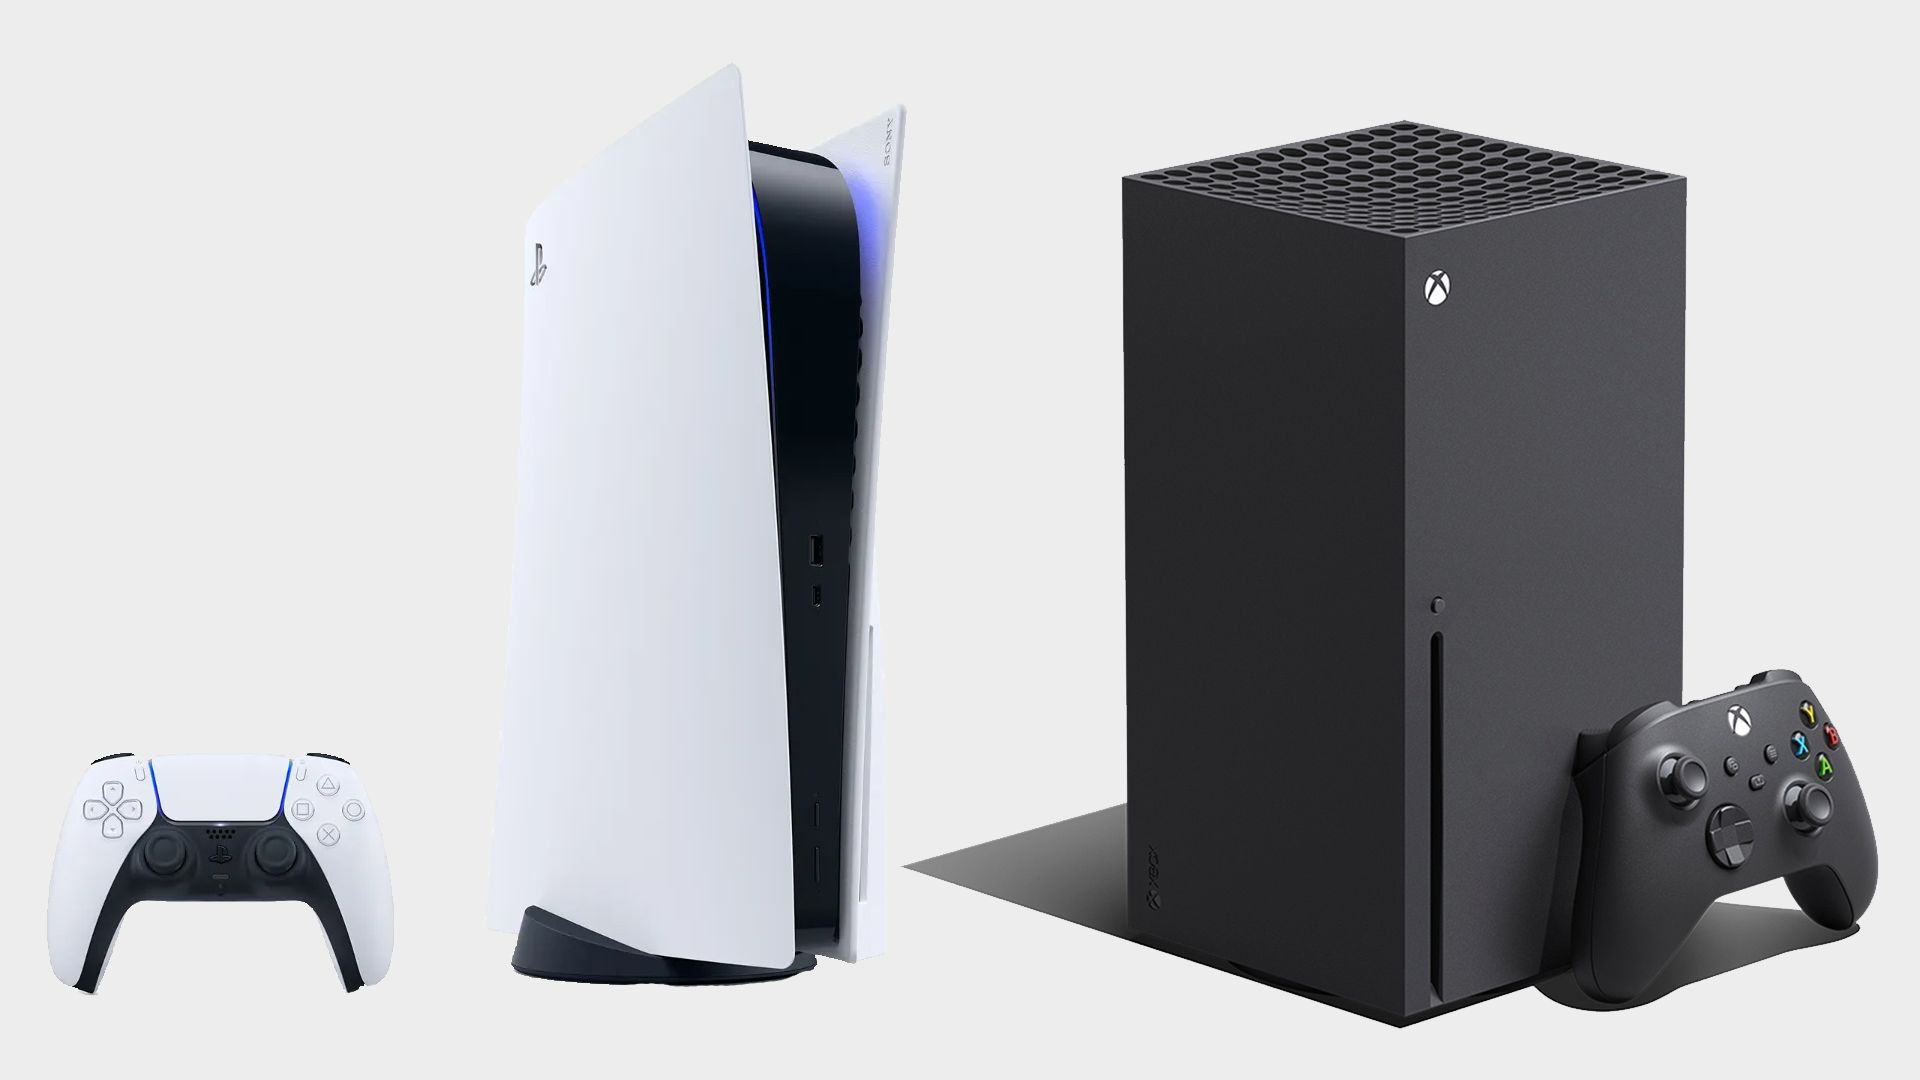
On se komia laite tuo Series X/S! Saas nähä meneekö ohi PS5 myynneissä genin loppuun mennessä.Hyvin on X myyny Japanissa.
Xbox Series X/S outsell PS5 in Japan for the second time
The two consoles last beat the PS5 in Maywww.gamesradar.com
Olisi aika iso juttu kun PS5 kumminkin se halutuin konsoli kaikkialla. Toivottavasti tuotanto-ongelmat alkaisivat jossain kohtaa hellittämään.On se komia laite tuo Series X/S! Saas nähä meneekö ohi PS5 myynneissä genin loppuun mennessä.

 gamertweak.com
Korjatkaa jos olen väärässä mutta eikö tosiaan Sony Studioiden peleistä löydy yhtäkään peliä 'Top 100 most played video games 2022'?
Listalla ei ole esim Dota2 jolla 7 miljardia pelaajaa. Eipä ole vaivauduttu edes Horizon zero dawnia tai GoWia tuonne laittaa jotka myyneet 20M+.En hirveän tarkasti listaa syynännyt läpi, mutta sijalla 85. oli The Last of Us Remastered.
Se ei paljoa hyödytä jos peli löytyy pelaajien hyllyltä mutta kukaan ei pelaa sitäListalla ei ole esim Dota2 jolla 7 miljardia pelaajaa. Eipä ole vaivauduttu edes Horizon zero dawnia tai GoWia tuonne laittaa jotka myyneet 20M+.

No miksi sitten postaa tuollaista listaa joka on täynnä noita?Se ei paljoa hyödytä jos peli löytyy pelaajien hyllyltä mutta kukaan ei pelaa sitä
Siksi postaa lista kun pohdin aikaisemmin miksi siellä ei yhtään Sonyn pelejä löydy. Moni voi saada väärän kuvan suosiosta mutta numerot ei valehtele.No miksi sitten postaa tuollaista listaa joka on täynnä noita?
Ehkä sun pitäis enemmän pohtia miksi postaa tollasta clickbait sontaa tänne.Siksi postaa lista kun pohdin aikaisemmin miksi siellä ei yhtään Sonyn pelejä löydy. Moni voi saada väärän kuvan suosiosta mutta numerot ei valehtele.

Ethän sä edes lukenut mun postausta kunnolla.Ehkä sun pitäis enemmän pohtia miksi postaa tollasta clickbait sontaa tänne.
USA:n myydyimmät pelit tähän asti


February 2022 NPD: Elden Ring is a smash hit - GamesBeat
Elden Ring is a dominant sales force. It is the best-selling game of 2022 so far this year, according to NPD tracking.venturebeat.com
No numeroiden perusteella 36% Horizon Zero Dawnin Pleikkarilleen asentaneista on pelannut sen läpi. Luvussa pitää huomioida että peli jaettiin ilmaiseksi kaikille, ei tarvinnut edes PS+ jsenyyttä, eli peli löytyy todella monelta. GoW taas 47% on läpäissyt pelin, ja tämänkin on jaettu sekä PS-collectionissa kaikille PS5 omistajille sekä nyt PS+ pelinä. Eli noiden prosenttien takana on isot numerot.Se ei paljoa hyödytä jos peli löytyy pelaajien hyllyltä mutta kukaan ei pelaa sitä
Kukaan ei pelaa Dotaa? Dota 2 on Steamin toiseksi pelatuin peli tällä hetkellä. Häviää vain CS:GO:lle.Se ei paljoa hyödytä jos peli löytyy pelaajien hyllyltä mutta kukaan ei pelaa sitä

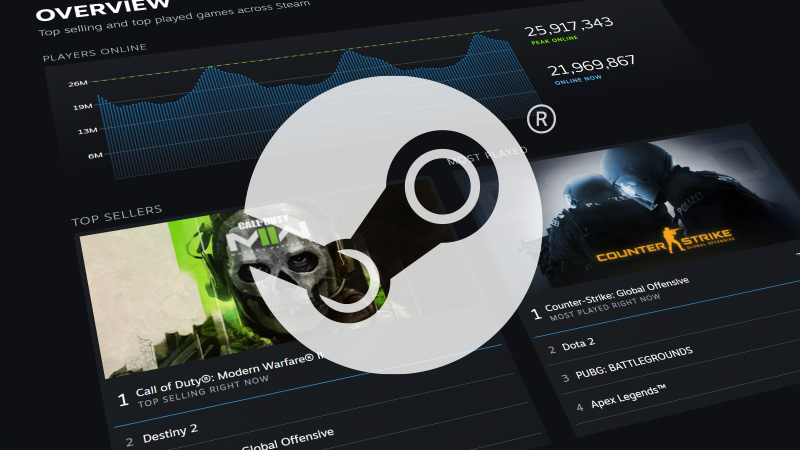
Korjatkaa jos olen väärässä mutta eikö tosiaan Sony Studioiden peleistä löydy yhtäkään peliä 'Top 100 most played video games 2022'?

Most Played And Popular Games In The World (2023-2024)
#1 Most Played Popular Game in the World - List of popular & most played games ranked by player count & copies sold.gamertweak.com
Nyt kun tuon Last of Us Remasteredin pelaajalukuja katsoin, niin vaikuttaa olevan melko SUS koko lista. Vuonna 2014 PS4:lle julkaistulla yksinpelillä olisi vuonna 2022 15.9M pelaajaa? Onko tuo peli edes myynyt noin paljoa PS4:llä?En hirveän tarkasti listaa syynännyt läpi, mutta sijalla 85. oli The Last of Us Remastered.
En minä Dotasta puhunutkaan, sitä tuskin kenenkään hyllyltä edes löytyy?Kukaan ei pelaa Dotaa? Dota 2 on Steamin toiseksi pelatuin peli tällä hetkellä. Häviää vain CS:GO:lle.
Tolla sun postaamalla listalla PUBG on ykkösenä ja sillä n. 100-kertainen pelaajamäärä Dotaan verrattuna. Steamin tilastoissa Dotalla on reippaasti enemmän pelaajia kuin PUBG:llä...

Nyt kun tuon Last of Us Remasteredin pelaajalukuja katsoin, niin vaikuttaa olevan melko SUS koko lista. Vuonna 2014 PS4:lle julkaistulla yksinpelillä olisi vuonna 2022 15.9M pelaajaa? Onko tuo peli edes myynyt noin paljoa PS4:llä?
The Last of Us became one of the best-selling video games, selling over 1.3 million units in its first week and 17 million by April 2018

 en.wikipedia.org
Taisit nyt väistää viestini ytimen, eli kritiikin postaamaasi hupilistaa kohtaan.En minä Dotasta puhunutkaan, sitä tuskin kenenkään hyllyltä edes löytyy?
Taidetaan laskea myös kaikki jotka on joskus edes kerran kokeillut peliäKukaan ei pelaa Dotaa? Dota 2 on Steamin toiseksi pelatuin peli tällä hetkellä. Häviää vain CS:GO:lle.
Tolla sun postaamalla listalla PUBG on ykkösenä ja sillä n. 100-kertainen pelaajamäärä Dotaan verrattuna. Steamin tilastoissa Dotalla on reippaasti enemmän pelaajia kuin PUBG:llä...

This list is according to the player count or the number of registered accounts in a game.
Noin väittävät, mutta listan 13M pelaajaa on kyllä täysin väärä lukema.Taidetaan laskea kaikki jotka on joskus edes kerran kokeillut peliä
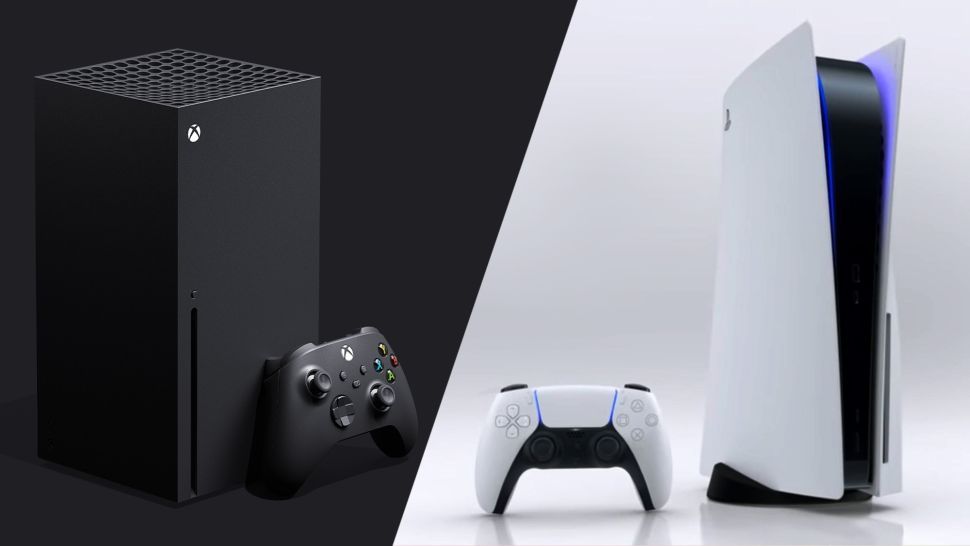
Series S on ollut kyllä lottovoitto Microsoftille tälläisissä keisseissä. Ainut konsoli Switchin lisäksi jota kauppojen hyllyltä löytyy ja se näkyy positiivisesti sitten myynneissä.
Juu, MS on antanut kuluttajille erittäin edullisen tavan pelata, yllättävän äkäinen pikkulaite on kyllä ja kelpaa monille heikosta viime-geni esityksestä huolimatta.!Positiivistä myös meille kuluttajille.

Series S on oikeasti aivan loistava peli, se riittää arviolta 90% pelaajista, hifistelijät voi sitten hakea PS5:sta tai XSX:ää kaupoista.
Aivan loistava muuvi Mikkikseltä
Hauska juttu miten ennen konsolijulaisua ps5 oli doomed, koska tflops. Nyt tapahtuikin inversio ja flopsit ovatkin vain hidaste. Niin se vaan maailma muuttuu.
Oma konsoliporukka siirtyi PC:n puolelle, koska eri syyt, mutta vähintään yhtä perustellut.Siinä olikin tiivistettynä miksi PC-pelaaminen on alkanut "kuolla", jossain ehkä jo 900-sarjan kohdalla rasterointi saatiin jo melko riittäväksi 1080p ja nyt tehoja ei saa juuri yhtään lisää isohkolla invenstoinnilla, vaan pitää maksaa todella paljon jos haluaa huomattavan päivityksen. 1000-sarja olikin mihin loppui oma ja tuttujen parin vuoden välein päivittäminen, osalla on sen jälkeen loppunut pelaaminen kokonaan tai siirtyneet konsoleihin.
Se on loppujen lopuksi todella pieni joukko joka on valmiita maksamaan tonneja, vaikka harrastukseksi se halpa onkin. Alkanut itsekin miettiä, että taas mennään tällä niin kauan kuin vain kestää, eipä noita uusia, lähinnä konsoleille suunniteltuja pelejä näköjään jaksa edes paljoa pelata. VR kiinnostaisi vähän, mutta sitten maksettaisiin taas ja paljon lisää.
Ummistitko silmäsi kokonaan sille keskustelulle mitä foorumeilla käytiin ennen konsolien julkaisua? Googleen kun kirjoittaa PS5 doomed teraflops jne niin johan alkaa löytymään.Haluatko laittaa jotain lainauksia/lähteitä tälle väitteelle vai pistetäänkö suoraan Olkiukko-osastolle?
 www.notebookcheck.net
Käytämme välttämättömiä evästeitä, jotta tämä sivusto toimisi, ja valinnaisia evästeitä käyttökokemuksesi parantamiseksi.
